


20 Aug 2023
1:00 am
Final
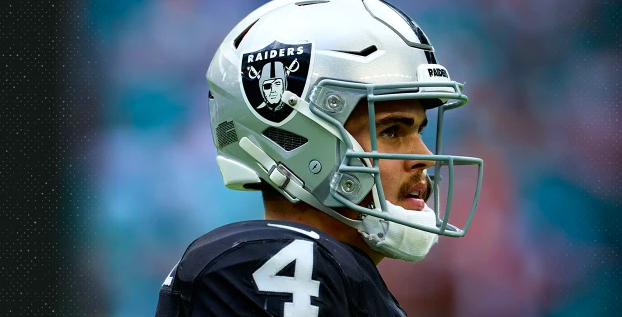
Las VegasRaiders

Raiders
34
-
17

Rams
Los AngelesRams
| 1 | 2 | 3 | 4 | T | |
|
|
7 | 13 | 7 | 7 | 34 |
|
|
0 | 10 | 7 | 0 | 17 |
Players
Las Vegas Raiders
4
7

10

35
29
30
34

22

47
89

13
84
83

19

16
87

3

86

87

82

20
42

56

36
26

59

27

99

41

62

24

24

94
43

69
26
21

51
92
58
97

42

1
40

37
33
2

6

Los Angeles Rams
13

15

20
21

24
19

87

16
18

15
81

35

38

48

51

26

94

43
96
37

27

41

2

31

6

90

92
95
97

33

20

22

69

34

42

56

93
92

98
47

50

58

54

91

49

Team Statistics
Las Vegas Raiders
Los Angeles Rams
25
Total 1st Downs
13
16
Passing 1st Downs
5
7
Rushing 1st Downs
6
2
1st Downs from Penalties
2
7-13
3rd Down Efficiency
3-11
0-1
4th Down Efficiency
0-0
70
Total Plays
50
440
Total Yards
224
11
Yards per Play
10
6.3
Total Drives
4.5
342
Total Passing
148
27-44
Passing Comp-Att
19-28
7.6
Yards per Pass
5.1
1
Interceptions Thrown
1
1-4
Sacks-Yards Lost
1-8
98
Total Rushing
76
25
Rushing Attempts
21
3.9
Yards per Rush
3.6
3-4
Red Zone (Made-Att)
1-2
7-50
Penalties
6-61
1
Total Turnovers
1
0
Fumbles lost
0
1
Turnovers Interceptions
1
31:39
Possession
28:21
1
Total Interceptions
1
0
Fumbles Recovered
0
1
Total Sacks
1
0
Total Safeties
0
17
Points Against
34
1
Int Touchdowns
1
Players Statistics
Las Vegas Raiders
| Passing | C/Att | Yds | Avg | TD | Int | Sacks |
|---|---|---|---|---|---|---|
| Brian Hoyer [QB] | 12/22 | 144 | 6.5 | 0 | 1 | 1-4 |
| Jimmy Garoppolo [QB] | 4/4 | 39 | 9.8 | 0 | 0 | 0-0 |
| Aidan O'Connell [QB] | 11/18 | 163 | 9.1 | 2 | 0 | 0-0 |
| Rushing | Yds | Att | TD | Lng |
|---|---|---|---|---|
| Damien Williams [RB] | 19 | 5 | 0 | 7 |
| Ameer Abdullah [RB] | 7 | 2 | 0 | 4 |
| Brandon Bolden [RB] | 7 | 1 | 1 | 7 |
| Sincere McCormick [RB] | 3 | 1 | 0 | 3 |
| Zamir White [RB] | 40 | 10 | 0 | 10 |
| Darwin Thompson [RB] | 15 | 2 | 0 | 12 |
| Aidan O'Connell [QB] | 5 | 3 | 0 | 7 |
| Tre Tucker [WR] | 2 | 1 | 0 | 2 |
| Receiving | Tgts | Rec | Yds | Lng | TD |
|---|---|---|---|---|---|
| Phillip Dorsett [WR] | 5 | 4 | 76 | 43 | 0 |
| Ameer Abdullah [RB] | 2 | 2 | 11 | 10 | 0 |
| Sincere McCormick [RB] | 1 | 1 | 1 | 1 | 0 |
| Zamir White [RB] | 1 | 1 | 9 | 9 | 0 |
| Keelan Cole [WR] | 6 | 5 | 60 | 21 | 0 |
| Jakobi Meyers [WR] | 1 | 1 | 18 | 18 | 0 |
| Kristian Wilkerson [WR] | 12 | 5 | 54 | 23 | 1 |
| Austin Hooper [TE] | 1 | 0 | 0 | 0 | 0 |
| Cam Sims [WR] | 3 | 1 | 12 | 12 | 1 |
| DeAndre Carter [WR] | 1 | 1 | 9 | 9 | 0 |
| Isaiah Zuber [WR] | 1 | 1 | 18 | 18 | 0 |
| Michael Mayer [TE] | 2 | 1 | 3 | 3 | 0 |
| Tre Tucker [WR] | 7 | 3 | 66 | 40 | 0 |
| John Samuel Shenker [TE] | 1 | 1 | 9 | 9 | 0 |
| Fumbles | Fum |
|---|
| Interceptions | Int | Yds | TD |
|---|---|---|---|
| Isaiah Pola-Mao [S] | 1 | 50 | 1 |
| Tackles | Tckl | Solo | Sck |
|---|---|---|---|
| Drake Thomas [LB] | 12 | 9 | 0 |
| David Long Jr. [CB] | 2 | 1 | 0 |
| Duke Shelley [CB] | 3 | 2 | 0 |
| Neil Farrell Jr. [DE] | 1 | 1 | 0 |
| Malcolm Koonce [DE] | 1 | 1 | 0 |
| Matthew Butler [DT] | 2 | 1 | 0 |
| Darien Butler [LB] | 1 | 1 | 0 |
| Luke Masterson [LB] | 3 | 2 | 0 |
| Amik Robertson [CB] | 1 | 1 | 0 |
| Sam Webb [CB] | 3 | 2 | 0 |
| Isaiah Pola-Mao [S] | 1 | 1 | 0 |
| Roderic Teamer [S] | 0 | 0 | 0 |
| Marcus Peters [CB] | 2 | 1 | 0 |
| Marcus Epps [S] | 1 | 0 | 0 |
| Jordan Willis [DE] | 2 | 2 | 0 |
| Jaquan Johnson [S] | 1 | 1 | 0 |
| Robert Spillane [LB] | 2 | 2 | 0 |
| Kana'i Mauga [LB] | 2 | 1 | 0 |
| Curtis Bolton [LB] | 4 | 4 | 0 |
| Tyler Hall [CB] | 1 | 0 | 0 |
| Adam Butler [DT] | 1 | 1 | 0 |
| Nesta Jade Silvera [DT] | 1 | 1 | 0 |
| Christopher Smith [S] | 1 | 1 | 0 |
| Amari Burney [LB] | 5 | 3 | 0 |
| Jaydon Grant [S] | 1 | 0 | 0 |
| David Agoha [DE] | 2 | 1 | 1 |
| Kick Returns | No | Yds | Lng | TD |
|---|---|---|---|---|
| DeAndre Carter [WR] | 1 | 30 | 30 | 0 |
| Tre Tucker [WR] | 1 | 14 | 14 | 0 |
| Punt Returns | No | Yds | Lng | TD |
|---|---|---|---|---|
| DeAndre Carter [WR] | 1 | 31 | 31 | 0 |
| Tre Tucker [WR] | 4 | 66 | 26 | 0 |
| Kicking | FG | Lng | XPM | XPA | Pts |
|---|---|---|---|---|---|
| Daniel Carlson [PK] | 2/2 | 46 | 4 | 4 | 10 |
| Punting | No | Yds | TB | in20 | Lng |
|---|---|---|---|---|---|
| AJ Cole [P] | 3 | 120 | 0 | 1 | 47 |
Los Angeles Rams
| Passing | C/Att | Yds | Avg | TD | Int | Sacks |
|---|---|---|---|---|---|---|
| Brett Rypien [QB] | 4/4 | 14 | 3.5 | 0 | 0 | 1-8 |
| Stetson Bennett [QB] | 15/24 | 142 | 5.9 | 0 | 1 | 0-0 |
| Rushing | Yds | Att | TD | Lng |
|---|---|---|---|---|
| Royce Freeman [RB] | 6 | 2 | 0 | 5 |
| Ronnie Rivers [RB] | 42 | 9 | 0 | 8 |
| Xavier Smith [WR] | 4 | 1 | 0 | 4 |
| Stetson Bennett [QB] | 4 | 1 | 1 | 4 |
| Zach Evans [RB] | 20 | 8 | 0 | 5 |
| Receiving | Tgts | Rec | Yds | Lng | TD |
|---|---|---|---|---|---|
| Demarcus Robinson [WR] | 7 | 2 | 8 | 8 | 0 |
| Royce Freeman [RB] | 2 | 2 | 3 | 6 | 0 |
| Tyler Johnson [WR] | 7 | 3 | 35 | 24 | 0 |
| Ben Skowronek [WR] | 2 | 2 | 25 | 18 | 0 |
| Xavier Smith [WR] | 1 | 1 | 25 | 25 | 0 |
| Zach Evans [RB] | 1 | 1 | 7 | 7 | 0 |
| Davis Allen [TE] | 8 | 8 | 53 | 15 | 0 |
| Fumbles | Fum |
|---|---|
| Austin Trammell [WR] | 1 |
| Interceptions | Int | Yds | TD |
|---|---|---|---|
| Jake Hummel [LB] | 1 | 21 | 1 |
| Tackles | Tckl | Solo | Sck |
|---|---|---|---|
| Vincent Gray [CB] | 2 | 2 | 0 |
| Robert Rochell [CB] | 1 | 1 | 0 |
| Quindell Johnson [S] | 4 | 4 | 0 |
| John Johnson III [S] | 4 | 2 | 0 |
| Earnest Brown IV [DE] | 2 | 1 | 0 |
| T.J. Carter [DE] | 1 | 0 | 0 |
| Zach VanValkenburg [LB] | 5 | 2 | 0 |
| Bobby Brown III [DT] | 2 | 1 | 0 |
| Marquise Copeland [DT] | 1 | 0 | 0 |
| Michael Hoecht [LB] | 2 | 0 | 0 |
| Jonah Williams [DE] | 1 | 0 | 0 |
| Daniel Hardy [LB] | 2 | 1 | 0 |
| Jake Hummel [LB] | 5 | 3 | 0 |
| Christian Rozeboom [LB] | 1 | 0 | 0 |
| Quentin Lake [S] | 3 | 2 | 0 |
| Russ Yeast [S] | 2 | 2 | 0 |
| Keir Thomas [LB] | 3 | 2 | 1 |
| Kobie Turner [DT] | 0 | 0 | 0 |
| Ryan Smenda Jr. [LB] | 1 | 0 | 0 |
| Alex Ward [LS] | 1 | 0 | 0 |
| Desjuan Johnson [DE] | 4 | 3 | 0 |
| Timarcus Davis [CB] | 3 | 2 | 0 |
| Tre'Vius HodgesTomlinson [CB] | 2 | 2 | 0 |
| Taron Vincent [DT] | 1 | 1 | 0 |
| Rashad Torrence II [S] | 2 | 0 | 0 |
| Tanner Ingle [S] | 1 | 1 | 0 |
| DeAndre Square [LB] | 1 | 0 | 0 |
| Jaiden Woodbey [LB] | 5 | 3 | 0 |
| Tyon Davis [CB] | 2 | 0 | 0 |
| Kelechi Anyalebechi [LB] | 1 | 0 | 0 |
| Cameron McCutcheon [CB] | 3 | 2 | 0 |
| Jordan Jones [CB] | 5 | 4 | 0 |
| Ethan Evans [P] | 1 | 1 | 0 |
| Kick Returns | No | Yds | Lng | TD |
|---|---|---|---|---|
| Demarcus Robinson [WR] | 1 | 24 | 24 | 0 |
| Ronnie Rivers [RB] | 1 | 18 | 18 | 0 |
| Xavier Smith [WR] | 3 | 47 | 18 | 0 |
| Punt Returns | No | Yds | Lng | TD |
|---|---|---|---|---|
| Austin Trammell [WR] | 1 | 5 | 5 | 0 |
| Kicking | FG | Lng | XPM | XPA | Pts |
|---|---|---|---|---|---|
| Tanner Brown [PK] | 1/1 | 25 | 2 | 2 | 5 |
| Punting | No | Yds | TB | in20 | Lng |
|---|---|---|---|---|---|
| Ethan Evans [P] | 7 | 388 | 1 | 2 | 65 |
Latest Games
Las Vegas Raiders
13 Aug 2023
8:00 pm
NFL 2023-2024 /
Preseason
/
Week1
San Francisco49ers

49ers
7
-
34
Raiders
Las VegasRaiders
Final
7 Jan 2023
9:30 pm
NFL 2022-2023 /
Regular Season
/
Week18
Kansas CityChiefs

Chiefs
31
-
13
Raiders
Las VegasRaiders
Final
1 Jan 2023
9:05 pm
NFL 2022-2023 /
Regular Season
/
Week17
San Francisco49ers
49ers
37
-
34
Raiders
Las VegasRaiders
Final


Los Angeles Rams
13 Aug 2023
1:00 am
NFL 2023-2024 /
Preseason
/
Week1
Los AngelesChargers
Chargers
34
-
17
Rams
Los AngelesRams
Final
8 Jan 2023
9:25 pm
NFL 2022-2023 /
Regular Season
/
Week18
Los AngelesRams
Rams
16
-
19

Seahawks
SeattleSeahawks
Final
1 Jan 2023
9:25 pm
NFL 2022-2023 /
Regular Season
/
Week17
Los AngelesRams
Rams
10
-
31
Chargers
Los AngelesChargers
Final


Head to Head Games
Commentary
Las Vegas Raiders
Los Angeles Rams
Touchdown
7-0
Brandon Bolden 7 Yd Run (Daniel Carlson Kick)
Q1 10:00
Field Goal
10-0
Daniel Carlson 46 Yd Field Goal
Q2 13:29
Q2 9:39
Field Goal
10-3
Tanner Brown 25 Yd Field Goal
Q2 8:42
Touchdown
10-10
Jake Hummel 21 Yd Interception Return (Tanner Brown Kick)
Touchdown
17-10
Isaiah Pola-Mao 50 Yd Interception Return (Daniel Carlson Kick)
Q2 1:35
Field Goal
20-10
Daniel Carlson 30 Yd Field Goal
Q2 0:00
Touchdown
27-10
Cam Sims 12 Yd pass from Aidan O'Connell (Daniel Carlson Kick)
Q3 8:48
Q3 1:40
Touchdown
27-17
Stetson Bennett 4 Yd Run (Tanner Brown Kick)
Touchdown
34-17
Kristian Wilkerson 2 Yd pass from Aidan O'Connell (Daniel Carlson Kick)
Q4 9:43
