


14 Nov 2021
6:00 pm
Final
AtlantaFalcons

Falcons
3
-
43

Cowboys
DallasCowboys
| 1 | 2 | 3 | 4 | T | |
|
|
3 | 0 | 0 | 0 | 3 |
|
|
7 | 29 | 7 | 0 | 43 |
Players
Atlanta Falcons
2

15

29

84

28

40

8

13

88

0

3


23

76

23

30

24

30

97

40

27


92

49

56

38

92

26

69

90

47


63

30

6


Dallas Cowboys
4

10

15
20

23

88

2

13

85

84

86

12

2

32

7

11

1

52

31

92

55

99

29

23

6

97
97

28
0

94

57


28

25


5

Team Statistics
Atlanta Falcons
Dallas Cowboys
11
Total 1st Downs
22
8
Passing 1st Downs
14
3
Rushing 1st Downs
8
0
1st Downs from Penalties
0
1-11
3rd Down Efficiency
6-14
0-2
4th Down Efficiency
3-3
53
Total Plays
72
214
Total Yards
431
12
Yards per Play
11
4.0
Total Drives
6.0
111
Total Passing
317
10-27
Passing Comp-Att
28-35
3.8
Yards per Pass
9.1
3
Interceptions Thrown
0
2-20
Sacks-Yards Lost
0-0
103
Total Rushing
114
24
Rushing Attempts
37
4.3
Yards per Rush
3.1
0-1
Red Zone (Made-Att)
5-5
6-41
Penalties
8-80
3
Total Turnovers
1
0
Fumbles lost
1
3
Turnovers Interceptions
0
22:19
Possession
37:41
0
Total Interceptions
3
1
Fumbles Recovered
0
0
Total Sacks
2
0
Total Safeties
0
43
Points Against
3
0
Int Touchdowns
1
Players Statistics
Atlanta Falcons
| Passing | C/Att | Yds | Avg | TD | Int | Sacks |
|---|---|---|---|---|---|---|
| Josh Rosen [QB] | 1/6 | 14 | 2.3 | 0 | 1 | 0-0 |
| Matt Ryan [QB] | 9/21 | 117 | 5.6 | 0 | 2 | 2-20 |
| Rushing | Yds | Att | TD | Lng |
|---|---|---|---|---|
| Cordarrelle Patterson [RB] | 25 | 4 | 0 | 14 |
| Keith Smith [FB] | 5 | 1 | 0 | 5 |
| Mike Davis [RB] | 18 | 4 | 0 | 7 |
| Wayne Gallman [RB] | 55 | 15 | 0 | 17 |
| Receiving | Tgts | Rec | Yds | Lng | TD |
|---|---|---|---|---|---|
| Cordarrelle Patterson [RB] | 2 | 1 | 14 | 14 | 0 |
| Frank Darby [WR] | 3 | 1 | 14 | 14 | 0 |
| Kyle Pitts [TE] | 5 | 4 | 60 | 18 | 0 |
| Olamide Zaccheaus [WR] | 6 | 2 | 22 | 13 | 0 |
| Mike Davis [RB] | 1 | 0 | 0 | 0 | 0 |
| Tajae Sharpe [WR] | 1 | 1 | 0 | 0 | 0 |
| Christian Blake | 1 | 0 | 0 | 0 | 0 |
| Russell Gage [WR] | 3 | 0 | 0 | 0 | 0 |
| Wayne Gallman [RB] | 2 | 1 | 21 | 21 | 0 |
| Fumbles | Fum |
|---|---|
| Kaleb McGary [OT] | 0 |
| Fabian Moreau [CB] | 0 |
| Matt Ryan [QB] | 1 |
| Interceptions | Int | Yds | TD |
|---|
| Tackles | Tckl | Solo | Sck |
|---|---|---|---|
| Duron Harmon [S] | 5 | 4 | 0 |
| Kyle Pitts [TE] | 1 | 1 | 0 |
| Chris Lindstrom [G] | 1 | 1 | 0 |
| Grady Jarrett [DE] | 5 | 2 | 0 |
| Adetokunbo Ogundeji [LB] | 3 | 2 | 0 |
| Mykal Walker [LB] | 2 | 2 | 0 |
| Darren Hall [CB] | 1 | 1 | 0 |
| A.J. Terrell [CB] | 7 | 4 | 0 |
| Richie Grant [S] | 3 | 3 | 0 |
| Fabian Moreau [CB] | 6 | 5 | 0 |
| Marlon Davidson [DT] | 2 | 1 | 0 |
| Deion Jones [LB] | 5 | 2 | 0 |
| Dante Fowler Jr. [DE] | 3 | 1 | 0 |
| Foyesade Oluokun [LB] | 14 | 6 | 0 |
| Olamide Zaccheaus [WR] | 2 | 2 | 0 |
| Josh Harris [LS] | 1 | 1 | 0 |
| Mike Pennel Jr. [DT] | 2 | 0 | 0 |
| Brandon Copeland [LB] | 3 | 1 | 0 |
| Avery Williams [CB] | 2 | 1 | 0 |
| Erik Harris [S] | 7 | 4 | 0 |
| James Vaughters | 1 | 1 | 0 |
| Tyeler Davison [DT] | 2 | 0 | 0 |
| Daren Bates | 3 | 2 | 0 |
| Kick Returns | No | Yds | Lng | TD |
|---|
| Punt Returns | No | Yds | Lng | TD |
|---|---|---|---|---|
| Avery Williams [CB] | 3 | 11 | 6 | 0 |
| Kicking | FG | Lng | XPM | XPA | Pts |
|---|---|---|---|---|---|
| Younghoe Koo [PK] | 1/1 | 35 | 0 | 0 | 3 |
| Punting | No | Yds | TB | in20 | Lng |
|---|---|---|---|---|---|
| Dustin Colquitt | 4 | 231 | 1 | 1 | 66 |
Dallas Cowboys
| Passing | C/Att | Yds | Avg | TD | Int | Sacks |
|---|---|---|---|---|---|---|
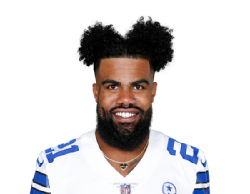
| Ezekiel Elliott [RB] | 1/1 | 4 | 4.0 | 0 | 0 | 0-0 |
| Dak Prescott [QB] | 24/31 | 296 | 9.5 | 2 | 0 | 0-0 |
| Cooper Rush [QB] | 3/3 | 17 | 5.7 | 0 | 0 | 0-0 |
| Rushing | Yds | Att | TD | Lng |
|---|---|---|---|---|
| Ezekiel Elliott [RB] | 41 | 14 | 2 | 9 |
| Corey Clement [RB] | 20 | 6 | 0 | 6 |
| Dak Prescott [QB] | 5 | 2 | 1 | 4 |
| Cooper Rush [QB] | -6 | 3 | 0 | -2 |
| Tony Pollard [RB] | 42 | 11 | 0 | 15 |
| CeeDee Lamb [WR] | 12 | 1 | 0 | 12 |
| Receiving | Tgts | Rec | Yds | Lng | TD |
|---|---|---|---|---|---|
| Amari Cooper [WR] | 4 | 4 | 51 | 22 | 0 |
| Ezekiel Elliott [RB] | 3 | 3 | 15 | 6 | 0 |
| Noah Brown [WR] | 1 | 1 | 18 | 18 | 0 |
| Dalton Schultz [TE] | 2 | 1 | 14 | 14 | 0 |
| Corey Clement [RB] | 1 | 1 | 5 | 5 | 0 |
| Malik Turner [WR] | 2 | 1 | 7 | 7 | 0 |
| Tony Pollard [RB] | 7 | 6 | 56 | 19 | 0 |
| Michael Gallup [WR] | 5 | 3 | 42 | 23 | 0 |
| CeeDee Lamb [WR] | 8 | 6 | 94 | 37 | 2 |
| Sean McKeon [TE] | 2 | 2 | 15 | 12 | 0 |
| Fumbles | Fum |
|---|---|
| Ezekiel Elliott [RB] | 1 |
| Interceptions | Int | Yds | TD |
|---|---|---|---|
| Trevon Diggs [CB] | 1 | 0 | 0 |
| Jourdan Lewis [CB] | 1 | 4 | 0 |
| Anthony Brown [CB] | 1 | 0 | 0 |
| Tackles | Tckl | Solo | Sck |
|---|---|---|---|
| Trysten Hill [DT] | 2 | 1 | 0 |
| Noah Brown [WR] | 1 | 0 | 0 |
| Kelvin Joseph [CB] | 0 | 0 | 0 |
| Damontae Kazee [S] | 2 | 2 | 0 |
| Keanu Neal [S] | 4 | 1 | 0 |
| Carlos Watkins [DT] | 1 | 0 | 0 |
| Luke Gifford [LB] | 1 | 0 | 0 |
| Dorance Armstrong [DE] | 3 | 3 | 1 |
| Chauncey Golston [DE] | 3 | 1 | 0 |
| Osa Odighizuwa [DT] | 2 | 1 | 0 |
| Micah Parsons [LB] | 6 | 6 | 1 |
| Leighton Vander Esch [LB] | 3 | 2 | 0 |
| Trevon Diggs [CB] | 2 | 1 | 0 |
| C.J. Goodwin [CB] | 2 | 2 | 0 |
| Jourdan Lewis [CB] | 3 | 2 | 0 |
| Nahshon Wright [CB] | 0 | 0 | 0 |
| Malik Hooker [S] | 2 | 0 | 0 |
| Jayron Kearse [S] | 6 | 1 | 0 |
| Donovan Wilson [S] | 2 | 1 | 0 |
| Tarell Basham [DE] | 4 | 3 | 0 |
| Justin Hamilton [DT] | 1 | 0 | 0 |
| Anthony Brown [CB] | 3 | 1 | 0 |
| Francis Bernard | 1 | 0 | 0 |
| Kick Returns | No | Yds | Lng | TD |
|---|---|---|---|---|
| Tony Pollard [RB] | 1 | 29 | 29 | 0 |
| Punt Returns | No | Yds | Lng | TD |
|---|---|---|---|---|
| CeeDee Lamb [WR] | 2 | 19 | 16 | 0 |
| Kicking | FG | Lng | XPM | XPA | Pts |
|---|---|---|---|---|---|
| Lirim Hajrullahu | 0/0 | 0 | 5 | 5 | 5 |
| Punting | No | Yds | TB | in20 | Lng |
|---|---|---|---|---|---|
| Bryan Anger [P] | 4 | 190 | 0 | 0 | 60 |
Latest Games
Atlanta Falcons
7 Nov 2021
7:00 pm
NFL 2021-2022 /
Regular Season
/
Week9
AtlantaFalcons
Falcons
27
-
25

Saints
New OrleansSaints
Final
31 Oct 2021
5:00 pm
NFL 2021-2022 /
Regular Season
/
Week8
CarolinaPanthers

Panthers
19
-
13
Falcons
AtlantaFalcons
Final
24 Oct 2021
5:00 pm
NFL 2021-2022 /
Regular Season
/
Week7
AtlantaFalcons
Falcons
30
-
28
Dolphins
MiamiDolphins
Final


Dallas Cowboys
7 Nov 2021
7:00 pm
NFL 2021-2022 /
Regular Season
/
Week9
DenverBroncos

Broncos
30
-
16
Cowboys
DallasCowboys
Final
1 Nov 2021
12:20 am
NFL 2021-2022 /
Regular Season
/
Week8
DallasCowboys
Cowboys
20
-
16

Vikings
MinnesotaVikings
Final
17 Oct 2021
8:25 pm
NFL 2021-2022 /
Regular Season
/
Week6
DallasCowboys
Cowboys
35
-
29

Patriots
New EnglandPatriots
Final

Commentary
Atlanta Falcons
Dallas Cowboys
Q1 11:42
Touchdown
0-7
CeeDee Lamb 13 Yd pass from Dak Prescott (Lirim Hajrullahu Kick)
Field Goal
3-7
Younghoe Koo 35 Yd Field Goal
Q1 8:24
Q2 13:24
Touchdown
3-14
Ezekiel Elliott 1 Yd Run (Lirim Hajrullahu Kick)
Q2 8:07
Touchdown
3-21
Ezekiel Elliott 2 Yd Run (Lirim Hajrullahu Kick)
Q2 1:10
Touchdown
3-28
CeeDee Lamb 9 Yd pass from Dak Prescott (Lirim Hajrullahu Kick)
Q2 0:37
Touchdown
3-36
Nahshon Wright 0 Yd Return of Blocked Punt (Ezekiel Elliott Run for Two-Point Conversion)
Q3 0:31
Touchdown
3-43
Dak Prescott 4 Yd Run (Lirim Hajrullahu Kick)
